One of the challenges I faced when I was building this web application was connecting my react/redux form to the Mailgun API which will enable emails to be sent to my inbox. This was very daunting as there weren’t enough post online that explained exactly what I needed to do to get this working. So with a lot of trial and error I eventually got it to work 😪, and here is a post with what I came up with.

Prerequisites- You have set up your contact form with the tutorial shown here
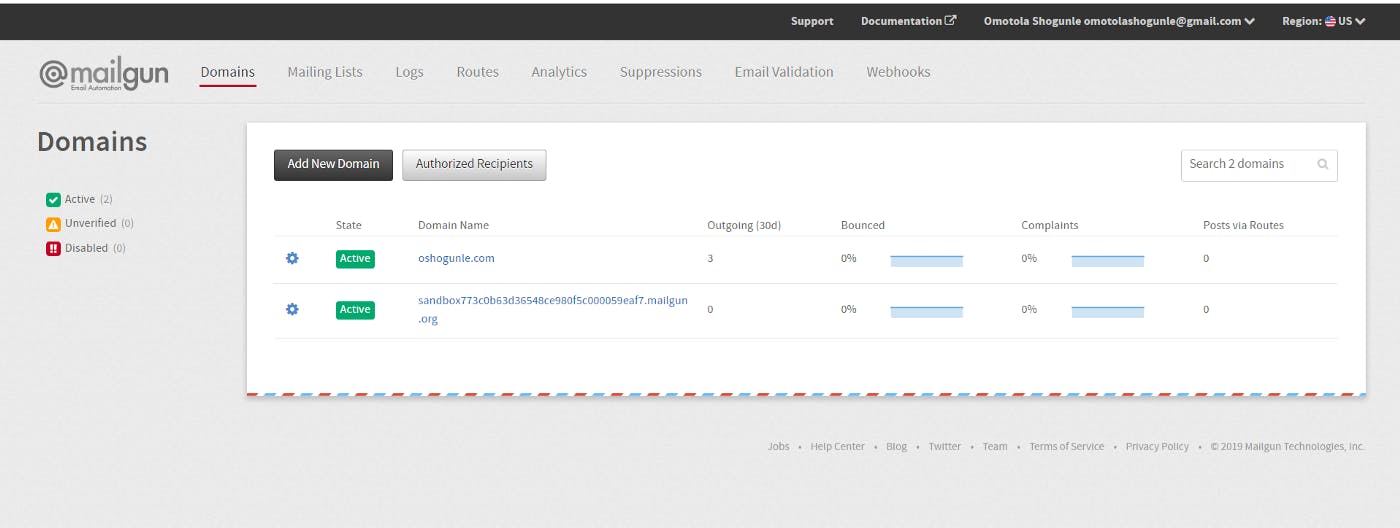
I used the Mailgun API to facilitate sending emails from my contact form. First create a Mailgun account, once your account has been verified login and navigate to Domains. Notice the list of domains, the first being my domain name, and the other a pseudo-domain name for development purposes, in case you want to try this out using localhost, the second domain can be used but this tutorial will mainly show how to implement Mailgun API for production.

Add new domain
Click on the add new domain button, it would suggest you use a subdomain, which enables you to send emails from an email address that has your domain name with it. Although this was recommended I used my domain name instead because the API would be configured with my Gmail email address.
Hosting
I use DigitalOcean, which is incredible for its cloud services and if you happen to be a student you get $50 credit for platform services by signing up for GitHub Education via the student pack, or you could use my referral link and get $100 while I get $25 for referring you 😊. If you have your host all set up then we can move on to configuring DNS records for the domain name.
Configure DNS records
If your digital ocean platform or any other platform that you choose to use is set up correctly you should be able to navigate to the DNS records for your hosting service and fill in the input boxes for TXT, MX and CNAME records. The details you need to fill in the boxes can be found under Domain Verifications & DNS from you Mailgun account when you click into your registered domain name. Here is an example of what my filled inputs look like on Digital ocean.

Installing Mailgun to your application
Go to your application directory and run the following command to add the Mailgun package to your package.json file. Either use npm or yarn depending on your package manager.
npm install mailgun-js
OR
yarn add mailgun-js
I have also set this up to use nodemailer-mailgun-transport which enables the use of nodemailer to send emails using the Mailgun API instead of SMTP protocol. Read more about this here. First install express, to route our forms post request, nodemailer and then nodemailer-mailgun-transport. I will be using yarn for the example code.
yarn add express
yarn add nodemailer
yarn add nodemailer-mailgun-transport
If you have used Webpack to bundle your app for the web, then you must have written a server.js file. In this file add your configuration for mailgun-js, start by importing your dependencies and adding your APIkey and domain from your mailgun account.
import express from 'express';
 import Mailgun from 'mailgun-js';
 import nodemailer from 'nodemailer';
 import nodemailerTransport from 'nodemailer-mailgun-transport';

 const auth ={
   auth: {
       api_key: 'Add own api key',
       domain: 'Add own domain name'
   }
  }

const nodemailerMailgun = nodemailer.createTransport(nodemailerTransport(auth));
const app = express();
app.post('/inbox', (req,res) => {
nodemailerMailgun.sendMail({
  from: req.body.email,
  to: YOUR EMAIL ADDRESS SHOULD BE ADDED HERE,
  subject: req.body.subject,
html: `<p>${req.body.message}</p>`,
  text: 'Mailgun rocks, pow pow!'
}, function (err, info) {
if (err) {
     console.log('Error: ' + err);
}
else {
    console.log('Response: ' + info);
}
});
})
I have set my app to route post request from inbox the page where my contact form is when I click on the submit button the values are received and can be plugged into these fields using req.body. To check what your form is sending back you could first console log req to see what values are being sent from your form. This is how my actual server.js file looks like.
Now we are done with configuration for the server side, let’s configure our mail to work on the client side.
You can visit my web page oshogunle.com/inbox to have a look of where this email series should eventually get to.
Continue here for part 2. Dont forget to thumbs up and share this post if it was useful.

