


If you are familiar with OOP concepts look for the header with practical examples below.
If not please continue reading. 😊
My first introduction to programming was with the programming langauge Java, and one of the concepts of programming with Java is Object Oriented Programming (OOP). For short, this concept encourages developers to code their software in a way that tries to model real life objects, so that
- Different components of your software can be represented well and
- Features of similar concerns can be grouped together.
To read more on this concept check out here
JavaScript is a multi-paradigm langauge, meaning it does not enforce any programming concepts unlike langauges like Java. This is not neccesarily a bad thing, it just means we can incoporate some Object Oriented Programming goodness into writing our JavaScript code.
In this write up we would be practicing this while creating a Student Registry Form.
- We would be using ES6 classes to demonstrate our example. JavaScript ES5 has a different approach using prototypes, but I find ES6 classes simpler and easier to read.
Before I move to the implementation we should look at the meaning of some keywords in object oriented programming.
Instantiating classes
In the OOP world when a class is Instantiated it means an object with unique/shared properties has been created. So for example
class Student {}

//If I wanted to create a student object then I would write the expression below
//to instantiate it.

const student1 = new Student();

//The code on the right represents the instantiation of the class of Student.
Constructors
These encapsulate the properties you would like to create every object with, and in JavaScript we do it like so
class Student {
    constructor(name, email, address, course){
        this.name = name;
        this.email = email;
        this.address = address;
                this.course = course;
    }
}

// When instantiating a new object with constructor properties we do it this way

const student1 = new Student('Tayo', 'tayo@gmail.com', '56 Mongromery House m7 780', 'Social Science');
const student2 = new Student('Peter', 'peter@hotmail.com', '12 Grunt Road m6 100', 'Nursing');

console.log(student1)
console.log(student2)

//You can see that we have constructed two different objects.
Methods in classes
Classes can also contain methods that can be called on each object after intialisation. For example
class Student {
    constructor(name, email, address, course){
        this.name = name;
        this.email = email;
        this.address = address;
                this.course = course;
    }

    getName(){
        return `Student name is ${this.name}`
    }
}

const student2 = new Student('Peter', 'peter@hotmail.com', '12 Grunt Road m6 100', 'Nursing');

console.log(student2.getName()) //This should print out the student name Peter
Inheritance/ Extending classes
Class inheritance is a common code practice where we have a super class that has similar properties or methods to its children classes, and then the children classes copy from their parent class. The child class can further extend its class functionality if need be.
Its just a neat way of making sure we are not repeating similar properties between multiple classes. Assuming that our class Student extends a parent class of Person. So we know a person can have a name, age and address but they might not have a course because they might not be students. We represent this like so
class Person {
    constructor(name, email, address){
        this.name = name;
        this.email = email;
        this.address = address;
    }

    getName(){
        return `Student name is ${this.name}`
    }
}

class Student extends Person {
    constructor(name, email, address, course){
                super(name, email, address);
                this.course = course;
    }
}

    const student2 = new Student('Hannah', 'hannah@hotmail.com', '1 Medley m3 493', 'Economics');

console.log(student2.getName()) // This will log the new name of student, Hannah
Inheritance allows the children objects to inherit all its parents properties and methods. In this case the Student class has inherited the propertied form name, age and address as well as method getName(). You can also add more methods or properties to the Student class.
NOTE: Student can access properties from Person but not the other way round.
Practical Example - OOP Practice using JavaScript
Remember I said with OOP we try to represent things as objects, and those objects normally have functions, properties etc that represents the object's functionality? So in this case we would have two objects to build the Student Registry app.
- Student Object - Which stores data about the student information like name, email, address etc
- UI Object - This object will be responsible for handling any changes in the the UI.
This is what our student registry form looks like and the class objects that represents the students and the ui
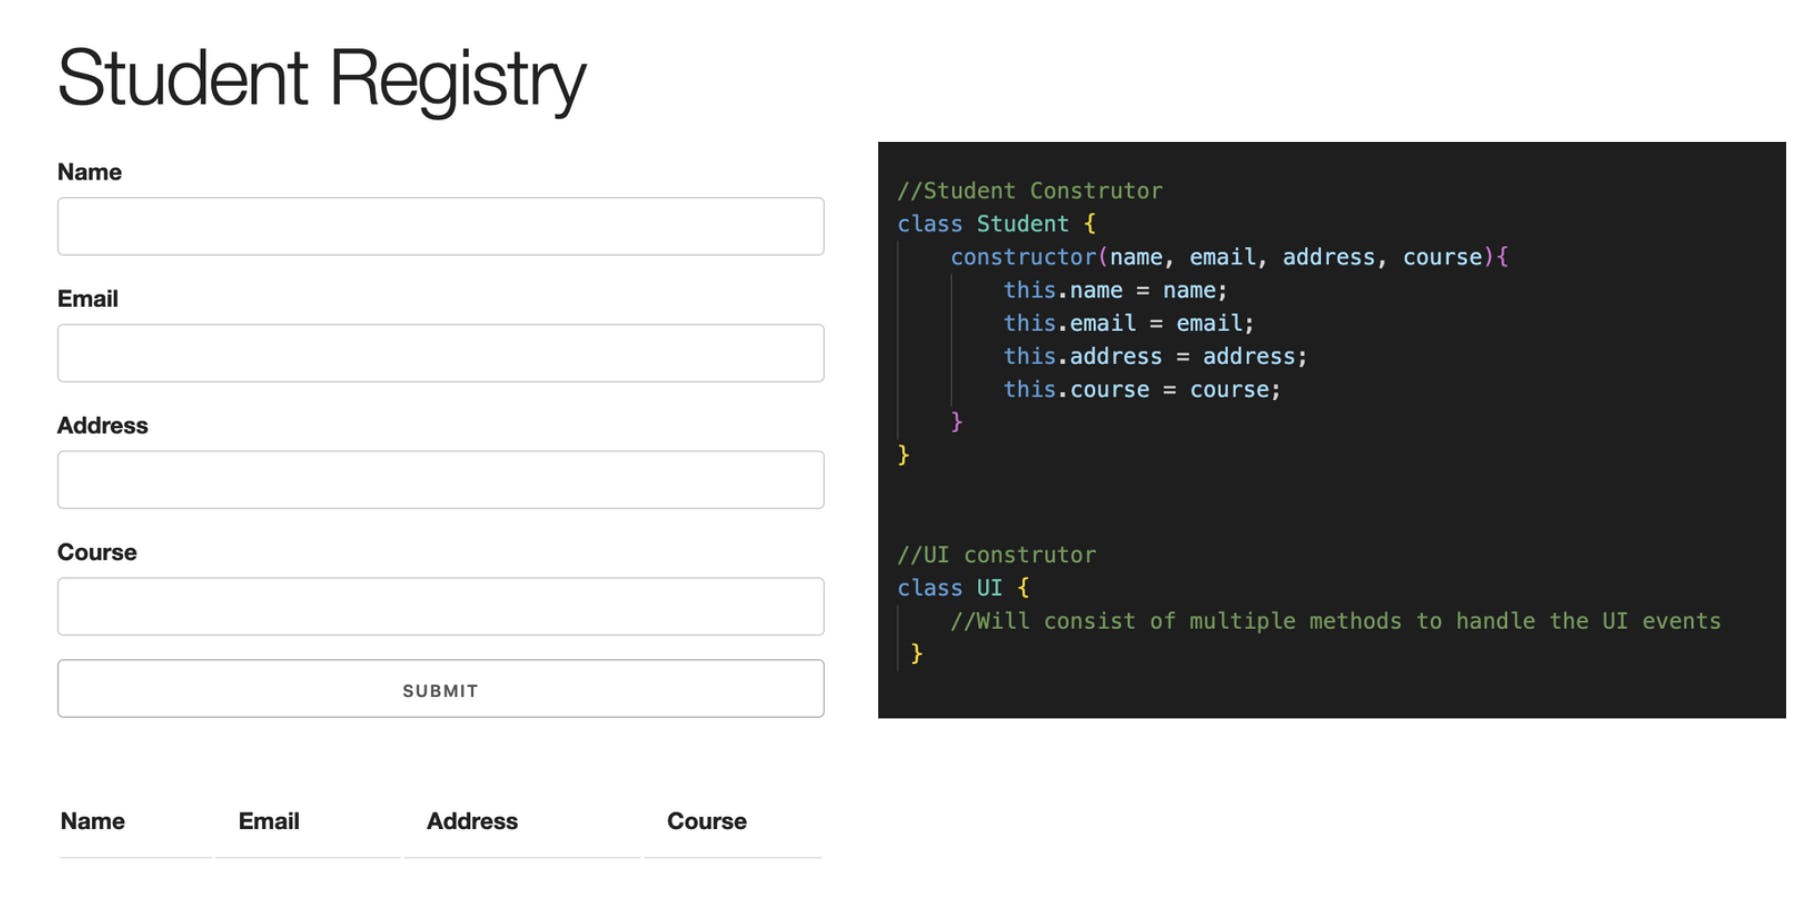
Here we have constructed a Student class which will take in the values from our form to be rendered in the table below the form. Lets take a look at how we would do this using classes in JavaScript
//Create event listeners
document.getElementById('student-form').addEventListener('submit', function(e){

    const name = document.getElementById('name').value;
          email = document.getElementById('email').value;
          address = document.getElementById('address').value;
          course = document.getElementById('course').value;

    //Initialise student
    const student = new Student(name, email, address, course);

    //Initialise UI
    const ui = new UI();

    //Validate
    if(name === '' || email === '' || address === '' || course === ''){
        ui.showAlert('Please fill in all fields', 'error')
    }else{
        ui.addStudentToList(student);
        ui.clearFields();
        ui.showAlert("Student added", "success")
    }

    e.preventDefault();
})
In the code above we have -
- Added an event listener to the form for student registry
- Once the form is submitted we would like to store the input values for name, email, address and course in variables as shown.
- Once the values are retrieve we can then instantiate our student class with the values.
- We also initialised our UI class
- The instance of the UI class we created allows us to call some of its functionality like showAlert, addStudentToList and clearFields.
- If the input fields are empty an appropriate ui function is called, else if everything is valid then we can add the student to the list, clear the input fields and show a success alert.
Lets look at the implementation for these methods
//UI construtor
class UI {

    //add student to list function
    addStudentToList(student){

        const list = document.getElementById('student-list');
        //create a tr element
        const row = document.createElement('tr');
        //insert cols in tr
        row.innerHTML = `
            <td>${student.name}</td>
            <td>${student.email}</td>
            <td>${student.address}</td>
            <td>${student.course}</td>
            <td><a href="#" class="delete">X</a></td>
        `;

        list.appendChild(row);

    }

}
Our first method in the class is addStudentToList here we
- accept the student object as an argument
- Select the table body element using getElementById
- Then create a tr element
- Then we insert our HTML in the tr element we just created and then access each of the Student class properties we would like to display.
- After this the row is appended to the table body.
Great we can add the second method of concern to our UI class which is the clearField method
    clearFields(){
            document.getElementById('name').value = '';
            document.getElementById('email').value = '';
            document.getElementById('address').value = '';
            document.getElementById('course').value = '';
    }

} // UI Class closing braces
This is a simple function that just sets the input field in the form to nothing once the form is submitted.
And finally the last showAlert which takes in two parameters the first one the alert message and the second argument is the name of the class.
    showAlert(message, className){

            const div = document.createElement('div');
            div.className = `alert ${className}`;
            div.appendChild(document.createTextNode(message));

            //get parent
            const container = document.querySelector('.container');

            const form = document.getElementById('student-form');

            container.insertBefore(div, form);
            setTimeout(() => {
                document.querySelector('.alert').remove();
            }, 3000);

    }
} // UI Class closing braces
In this function
- A div is created and classnames alert and the classname passed is added to it
- A text node is created with the message passed
- Both the container and the form is selected to guide where the alert message should be inserted
- And in this case we want to insert the div we created just between the form and the container div.
- After 3 seconds the alert bar is removed.
This is a brilliant way to write your code because it makes everything more resuable. Can you add a delete method to our ui class? Give it a shot. You would need knowledge on targetting elements to be deleted written here
To test our code so far the output looks like so.
If you found this useful please react to the post, share or leave a comment below!
If you read till here you might be interested in
Learning JavaScript? My Dating Analogy for CallBacks / Promises / Async & Awaits
Learning JavaScript? Series - Debugging like a pro using Console.log()